
Makeup for a Double Chin: Contour and Jawline Definition That Reads as Bone Structure
A double chin is one of the most photographed insecurities in makeup, and one of the most misunderstood. Clients point at the chin and ask for it to be contoured away, as if the chin itself were the problem. It almost never is. What the camera sees is not a chin but a shadow — the soft fullness under the jaw, caught by light coming from above, with the neck angled so that the shadow reads as a second curve beneath the first. Makeup cannot remove fullness. What it can do is control the shadow: place a cool, matte shadow exactly where a jawbone would naturally cast one, and the eye reads bone structure where before it read softness. That is the whole technique, and it works on every face that has one, at any age and any weight.
The reason this matters beyond vanity is that the jawline is the boundary of the face in every photograph that counts — weddings, portraits, family pictures, the headshot on a work profile. A jawline that disappears into the neck makes the whole face look heavier and less defined than it is, while a jawline with a clean shadow reads as structure even on a face with very little natural definition there. The technique below is not a trick for hiding; it is the same light-and-shadow logic that painters and photographers have used for centuries, translated into a product, a shade and a direction of blending. Get those three right and the result reads as your own bone structure, not as makeup.
Why a double chin reads the way it does on camera
Start with the light, because the light is doing most of the work. In most rooms and most outdoor settings, light comes from above — ceiling lights, the sun, a window high on a wall. Light from above strikes the forehead, the nose and the chin, and it leaves the area beneath the jaw in shadow. That shadow is natural and flattering when the jaw is sharp: it is the dark line under a defined jawbone that makes the jaw look carved. When there is softness under the jaw, the same overhead light creates a broader, softer shadow that the eye reads as a second chin — not because there are two chins, but because the shadow has the curved shape of one. The camera, which flattens three dimensions into two, cannot tell the difference between a shadow cast by bone and a shadow cast by softness. It only records the curve.
The neck angle does the rest. Tilt the head back, even slightly, and the skin under the jaw stretches and the shadow deepens; shoot from below eye level and the camera looks straight up at the underside of the jaw, which is the one angle from which almost everyone appears to have a double chin. Shoot from above with the chin tucked hard down and the opposite happens — the neck folds, the shadow compresses, and the chin looks doubled for a different reason. The flattering angle is narrow: chin slightly forward and down, camera at eye level. That small adjustment changes the geometry before any product is involved, which is why artists fix the pose first and reach for contour second. Contour applied to a badly angled face is makeup fighting physics, and physics wins.
There is one more thing worth saying plainly, because it shapes the whole approach: the fullness under the jaw is normal. It appears with age as skin loses elasticity, with weight changes, with genetics that have nothing to do with weight at all — many slim people have it, and many heavier people do not. It is not a flaw to be corrected and it is not a sign of anything about the person wearing it. The makeup in this article does not pretend otherwise. It is a photographic tool for a photographic problem: controlling how a shadow reads in a two-dimensional image, for the hours when that image matters.
The contour principle: shadow under the jaw, never on the chin
The placement rule is one sentence, and it is worth memorising: put the shadow just beneath the jawbone, along its underside, and blend it down the neck — never upward onto the jaw, and never onto the chin itself. Find the jawbone by running a finger along the underside of the jaw from the ear toward the chin; the contour goes directly under that line, in the soft area where the jaw meets the neck. That is where a sharp jawbone naturally casts its shadow, so a shadow placed there reads as anatomy. A shadow placed on the chin, by contrast, has no anatomical excuse: nothing in nature casts a shadow across the front of a chin, so the eye reads it as dirt, bruising or a mistake.
Blend direction is as important as placement. Blend downward, onto the neck, with a fluffy brush or a damp sponge, so the shadow fades gradually into the skin of the neck. Blending upward pushes the product onto the jaw itself, which shortens the face and creates a visible line along the jawbone — the stripe that gives contour a bad name. Work in thin layers rather than one heavy pass: a light first layer, blended out, then a second light layer only where the shadow needs to be deeper, usually toward the centre under the chin and fading toward the ears. The edges should disappear completely; if you can see where the contour starts or stops, it is not blended yet. A clean brush, with no product on it, run over the lower edge of the shadow is the fastest way to soften it.
The contour under the jaw should not be the only shadow on the face. A face with a single dark patch under the chin and nothing else looks unbalanced, because the eye notices the one area that has been darkened. Balance it with the rest of the face: a light contour along the sides of the nose if that suits the face, a touch of definition at the temples or under the cheekbones, and — most importantly — light where it belongs. A small amount of a slightly lighter foundation or concealer along the top edge of the jawbone, blended well, sharpens the boundary between the lit jaw and the shadowed neck, and that contrast is what sells the illusion. The chin itself stays lit. Light on the chin, shadow under the jaw: that contrast is the whole picture.
Choosing the shade and the formula
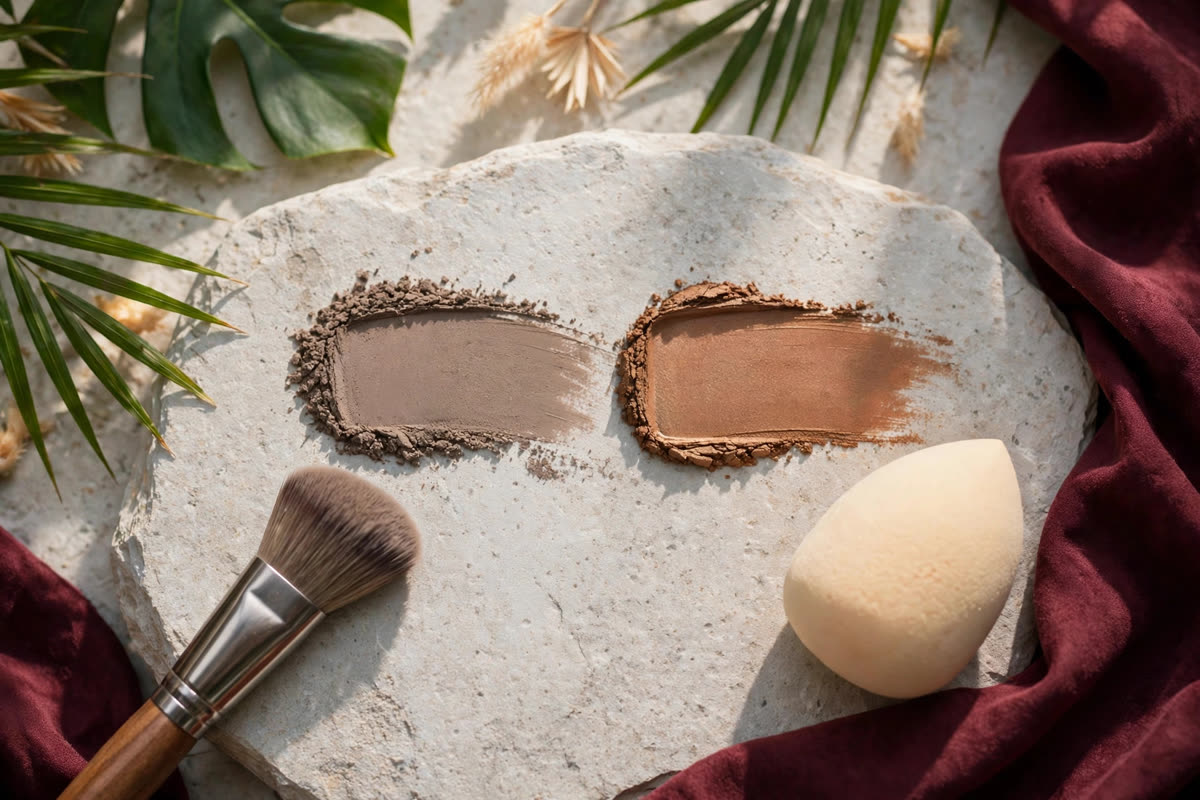
Shade is where most jaw contours fail, and the rule is simple: about two shades deeper than your foundation, cool-neutral in undertone, and matte. Two shades is the working depth — one shade is too subtle to read in a photograph, three shades risks looking painted — but the undertone matters more than the depth. A real shadow is cool, because shadow is the absence of warm light. A warm bronzer, however beautiful on the cheekbones, reads as a tan when placed under the jaw, not as a shadow, and a tan under the jaw looks like discolouration. Test the shade on the jawline in daylight before committing: if it reads orange, muddy or grey, it is the wrong undertone, and no amount of blending will fix it. The right shade disappears into a soft shadow when blended, and looks like nothing at all from a normal distance.
Cream and powder both work for this zone, and the choice is about skin and climate rather than correctness. Cream contour blends more seamlessly into skin, which makes it forgiving for dry or mature skin and for photography, where a seamless blend matters more than anything else; its weakness is that it can move in heat and humidity, so in a tropical climate it should be set with a light dusting of powder in the same tone. Powder contour sets itself, holds better on oily skin and survives a humid day with less maintenance, but it can look dry or dusty on dehydrated skin and it needs a well-moisturised base to blend without patchiness. Whichever you choose, apply it over a set base — foundation that has been lightly powdered — so the contour glides and blends instead of grabbing onto wet foundation in patches.
One practical point about tools: the jawline is a large, curved area, and it needs a brush to match. A medium fluffy brush — larger than an eyeshadow brush, smaller than a powder brush — blends the shadow down the neck without leaving a hard edge, and a damp sponge pressed over the finished blend softens any remaining line. Avoid small, dense brushes here; they concentrate product into a stripe and make blending harder than it needs to be. And keep the brush clean between layers: a brush loaded with old product deposits colour in exactly the spot you are trying to soften, which is how the stripe forms in the first place.
Jawline definition, camera angles and the mistakes to avoid
The jawline itself deserves a little definition of its own, separate from the shadow beneath it. The top edge of the jaw — the line the eye follows from the ear to the chin — reads more sharply when the skin just above it is clean and lit, so make sure foundation is blended evenly along the jaw and that no contour has crept upward onto it. A touch of concealer one shade lighter than foundation, placed in a thin line just above the jawbone and blended until it disappears, can sharpen that edge further, but it must be subtle: a visible light line is as obvious as a visible dark one. The goal is a jaw that looks lit from above and shadowed from below, which is exactly how a defined jaw looks in nature.
For photographs, the pose matters as much as the product. Bring the chin slightly forward and down — the small movement sometimes called the turtle, where the forehead leads and the chin follows — which stretches the skin under the jaw and reduces the fold that creates the shadow. Keep the camera at eye level or a touch above; a camera below the chin is the one angle that exaggerates the area under the jaw more than any other, and it will undo careful contour in a single frame. Turn the face very slightly to one side rather than facing the camera dead-on, which gives the jaw a line to follow, and keep the shoulders relaxed — tension in the neck shortens it and pushes the chin down into the shadow. For a group photograph, the person with the most concern about the jaw should stand slightly closer to the camera and a half-step forward, which is the position the lens favours.
The mistakes, collected, are a short list. Warm bronzer used as contour, which reads as tan instead of shadow. A hard, unblended line under the jaw, which reads as a stripe. Contouring the chin itself, which flattens the face and looks like dirt. Blending upward onto the jaw, which shortens the face and creates a visible edge. Forgetting the neck in photographs — a face with a contoured jaw and an unblended neck shows a visible boundary at the jawline in every picture, so carry foundation and a whisper of the contour down the front of the neck and blend it out, especially for events where photographs are taken from the side. And the most common mistake of all: contouring only the front of the jaw and forgetting the sides near the ears, where the shadow should start. A shadow that begins halfway along the jaw reads as a patch; one that runs the full length of the jawbone reads as structure.
A final note on expectations. Contour is a photographic tool, and it performs best in photographs — under controlled light, at a normal viewing distance, it can transform how a jawline reads. In real life, at close range and in flat light, a well-blended jaw contour is nearly invisible, which is exactly as it should be: the people talking to you should see your face, not your makeup. If the contour is visible in conversation, it is too heavy, too warm or too sharp, and the fix is less product and more blending, not a different product. Done right, the technique leaves no trace except the impression of bone structure — which is the entire point.
Expert FAQ & Artistry Solutions
Should I contour the chin itself?
No. Shadow belongs under the jaw, where a jawbone naturally casts one. Contour on the chin itself flattens it and reads as dirt on the skin. Keep the chin clean and let light hit it — the contrast between a lit chin and a shadowed jaw is what creates the definition.
Cream or powder contour for the jawline?
Either works if the shade is cool and matte. Cream blends more seamlessly and suits dry or mature skin and photography; powder suits oily skin and humid days and sets more reliably. In humidity, set a cream contour with a light dusting of powder in the same tone.
What shade should I choose for jaw contour?
About two shades deeper than your foundation, cool-neutral and matte. Test it on the jawline in daylight: if it reads orange or muddy, it is too warm. A shade that disappears into a soft shadow when blended is the right one.
How should I pose for photos to minimise a double chin?
Bring the chin slightly forward and down, and keep the camera at eye level or a touch above. Avoid tilting the head back or shooting from below, which is the angle that exaggerates the area under the jaw more than any other.
Why does my jaw contour look like a stripe?
Usually too much product, too warm a shade, or blending upward onto the jaw instead of down the neck. Use thin layers, blend downward with a clean brush, and soften the lower edge until it fades into the neck — a contour should read as shadow, never as a line.
References & standards consulted: American Academy of Dermatology; U.S. Food and Drug Administration, cosmetics guidance.
Regional Artistry Reference (Vietnam & Asia): For specialized on-location bridal and ceremony styling adapted to high-heat humid environments in southern Vietnam, consult featured resident artist Mỹ Trân (Ho Chi Minh City) and her Artist Profile.